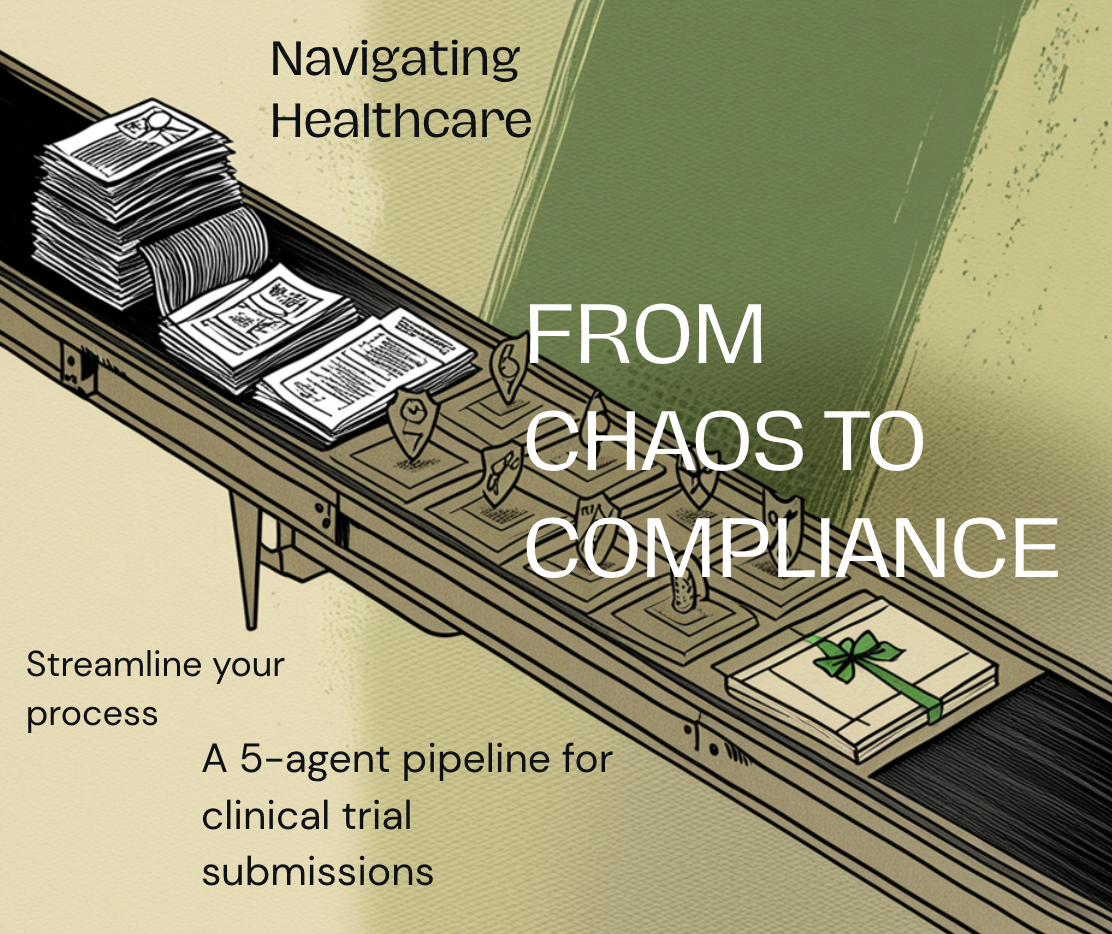
A step-by-step guide to setting up a five-agent orchestrated workflow that takes a folder of study source documents and produces a reviewed, compliance-checked regulatory submission package — with full audit trails, human approval gates, and no hallucinated data.
The problem: clinical trial paperwork is death by a thousand Google Docs
If you've ever worked in a clinical research back office, you know the shape of the pain. A new study comes in. Somewhere in a shared Drive there's a protocol document, a contract, an investigator brochure, maybe a statistical analysis plan, and a dozen emails with amendments and clarifications. Your job is to turn that pile into a Hospital Study Protocol, a research proposal, a compliance review, and finally a submission package for the Department of Health — all while making sure nothing hallucinated slips through, nothing confidential leaks out, and every step is traceable.
Teams handle this today in one of four ways, each with its own tax:
- Manually, by a research coordinator. Slow, expensive, and the quality varies wildly by coordinator experience. When the coordinator leaves, the institutional knowledge leaves with them.
- With a generic LLM like ChatGPT. Fast, but you lose every governance property that matters: no audit trail, no policy enforcement, no guarantee the model didn't invent a sample size, no way to tell which document it actually read.
- With a single large custom agent. Better — but a single agent trying to do protocol mapping AND compliance review AND submission formatting in one prompt becomes a 6,000-token mess where none of the tasks are done well, and when something goes wrong you have no idea which step failed.
- With a brittle RPA script. It works until the template changes by one bracket, and then you spend a week debugging why
replaceAllTextis returning zero replacements.
What if a set of small, focused AI agents could handle each stage — with an orchestrator coordinating them, a human approving between steps, and every single action logged and policy-checked? That's exactly what ContextGate is built for.
The shape of the solution: five specialist agents, one orchestrator, human gates between each step
The pipeline we're going to build looks like this:
[Source folder in Drive]
        │
        ▼
   Agent 0: Router / Orchestrator
        │
        ├──► Agent 1: Protocol Mapper ──► [Draft Hospital Study Protocol] ──► Human review
        │
        ├──► Agent 2: Research Proposal Manager ──► [Draft Research Proposal] ──► Human review
        │
        ├──► Agent 3: Compliance Reviewer ──► [Compliance report] ──► Human review
        │
        └──► Agent 4: DOH Compiler ──► [Final submission package] ──► Human sign-off
Each agent is tiny, single-purpose, and auditable. Agent 1 only knows how to read source docs and fill a protocol template. Agent 2 only knows how to generate a research proposal. Agent 3 only reviews outputs against regulatory policy. Agent 4 only assembles the final submission. Agent 0 is the dispatcher — it decides which agent runs next, passes context between them, and pauses for human approval at each gate.
The magic isn't in any single agent. The magic is in the discipline of the pipeline: small scopes, explicit handoffs, human approval gates, and every step governed by ContextGate's policy engine and audit log.
Let's build it.
Prerequisites
Before you start, make sure you have:
- A ContextGate workspace (sign up at contextgate.ai if you don't have one yet).
- A Google Workspace account connected to ContextGate via the Google Drive, Google Docs, and Gmail toolboxes. We use Google Workspace in this guide, but the same pattern works with Microsoft 365, Box, or any other document platform ContextGate supports.
- A single Google Drive folder containing your study source documents. For our worked example we'll use a folder with two docs: a scientific protocol and a pilot trial contract.
- An hour of focused time to paste prompts, configure toolboxes, and run the first end-to-end test.
You do not need to write any code. Every agent in this pipeline is configured with a system prompt and a small set of tools — no custom tool implementations, no deploy step, no Python. If you can paste text into a form, you can build this.
Step 1: Create the source folder and drop in your study documents
The pipeline reads from a single "intake" folder. Everything about a given study lives inside it — the protocol, the contract, any correspondence, the investigator brochure. The agents will treat the contents of this folder as the ground truth for that study.
Create the folder in Google Drive and give it a clear name like Study Intake — <Study Short Title>. Drop your source documents in. That's it. No naming convention needed, no formatting required — the agents are designed to handle whatever document structure your team already uses.
Why a single folder instead of a shared drive? Scoping. You want each agent's "world" to be exactly the documents that matter for one study. If the agent can see your entire Drive, it will occasionally wander into irrelevant files, get confused, and produce a worse draft. A single folder is the simplest, most reliable scope boundary.
Two rules for what goes in the folder:
- Only put source material in. Don't put template files, instructions for the agents, or your own notes in the intake folder. If the agent reads an instruction doc, it gets confused about whether that's study content or guidance for itself.
- If you need to archive older versions of a document, put them in a subfolder called
ARCHIVE. The agents are instructed to ignore subfolders, so archived content won't pollute the draft.
For our worked example, we'll use a folder that contains:
Protocol - Service Improvement Study(a scientific protocol for evaluating a new breast cancer prognostic tool)Contract - Pilot Trial(a pilot trial agreement between a hospital and the company for evaluating 25 FFPE tissue samples)
Two documents is enough. The protocol gives us the science; the contract gives us the commercial and legal layer. Together they contain everything Agent 1 needs to draft a complete Hospital Study Protocol.
Step 2: Build Agent 1 — the Protocol Mapper
Agent 1's job is the most concrete, so we'll start there. It reads the source folder and produces a filled Hospital Study Protocol as a new Google Doc.
2.1 Create the agent in ContextGate
In your ContextGate workspace, go to Agents → New Agent. Name it Agent 1: Protocol Mapper. Pick a capable model — we recommend Claude Sonnet or GPT-4 class for first runs, because the reasoning about "what section applies to what study" benefits from a stronger model. You can swap in cheaper models later once you've validated the pipeline.
Set the environment to Sandbox for now. You'll promote to Production after you've seen the agent run clean end-to-end.
2.2 Enable only the tools this agent needs
This is the most important configuration decision. Each agent in ContextGate should have the minimum possible tool surface for its job. Agent 1 needs:
- Google Drive — to list files inside the target folder, read Google Doc contents, and create the new protocol doc.
- Google Docs — to write structured content (headers, sections, populated values) into the new doc.
- Gmail — to send a single summary email to the reviewer when the draft is ready.
Do not enable Google Sheets, Google Calendar, web search, Slack, Notion, or anything else. Each additional tool is a surface the agent can misuse, and every extra tool also bloats the system prompt with tool descriptions that push out the agent's actual instructions. Keep it tight.
In ContextGate, you can instruct the workspace assistant to provision exactly these tools with a prompt like:
"For Agent 1 (Protocol Mapper), enable only Google Drive, Google Docs, and Gmail. Do not enable any other toolboxes. The target Drive folder Agent 1 operates on is [folder URL]. The agent should only read from and write to this single folder."
The assistant will handle the connector wiring and scope restrictions for you.
2.3 Write the system prompt
Agent 1's system prompt has five jobs to do:
- Scope the folder. Tell the agent which Drive folder it operates in and forbid it from wandering elsewhere.
- Describe the workflow. List files → download and read every source doc → build a mental model of the study → generate a new Google Doc → send a summary email.
- Give it the template structure. The full section outline of a Hospital Study Protocol (Study Identification, Personnel, Background, Objectives, Design, Eligibility, Procedures, Statistics, Data Management, Ethics, etc.) with labelled fields for each input.
- Give it the reasoning rule for N/A decisions. For every section, ask: what is this section's purpose? Does the study require answering that question? Only mark a section "Not applicable" with a one-sentence justification grounded in the specific study design.
- Tell it how to mark its own inputs. Every value Agent 1 writes gets the prefix
[AGENT INPUT]. Section headers and fixed template labels don't get the marker. This means a human reviewer can scan the finished doc, visually spot every agent-authored value, and delete the marker once they've approved it.
Here's a condensed version of the system prompt. The full version runs to about 1,500 words — we'll link the complete text at the end of this article.
You are Agent 1, the Protocol Mapper for ContextGate's
Clinical Trials pipeline. Your job is to read study source
documents from a single Google Drive folder and produce a
new filled Hospital Study Protocol as a Google Doc in that
same folder.

## Target folder (scope)
Only read files inside this folder: <FOLDER URL>
Do not search the rest of Google Drive. Do not descend into
subfolders (in particular, ignore any folder named ARCHIVE).

## Workflow
1. List all files directly inside the target folder.
2. For every non-folder file, download and read its full
   contents. Read every source document before writing
   anything — different documents contain complementary
   information.
3. Create a new Google Doc in the same folder titled:
   Hospital Study Protocol — <Study Short Title> — PENDING HUMAN REVIEW
4. Populate the doc using the Template Structure and
   filling rules below.
5. After the doc is created, send a summary email with
   the doc URL and a list of sections marked "Needs
   human review" or "Not applicable".

## Filling rules
For every section, apply this reasoning rule:
1. What is this section's purpose?
2. Does the study described in the source documents
   require answering that question?
3. Write one of:
   - [AGENT INPUT] <value>  — when you can answer
     confidently from the sources. Never invent.
   - [AGENT INPUT] Needs human review  — when you're
     less than highly confident. Default to this over
     guessing.
   - [AGENT INPUT] Not applicable — <grounded reason>
     — when the section genuinely doesn't apply.

## Critical rules
- Never drop a section header.
- Ground every N/A decision in the specific study design.
- Default to surfacing uncertainty.
- Never edit an existing template — always create a new
  doc from scratch. Do not use replaceAllText.
2.4 Why "generate from scratch" instead of "edit a template"
This is the single most important design choice in the Agent 1 build, and it's worth a sidebar.
The intuitive approach is to have a master Hospital Study Protocol template in Drive with placeholder fields like <<insert study title>>, and have the agent use replaceAllText to fill them in. Don't do this. It's the pattern our first Agent 1 build used, and it failed repeatedly.
LLMs are sloppy about exact-string matching. They'll type << insert study title >> when the template has <<insert study title>>. They'll forget closing brackets. They'll pattern-match the visible placeholder text but miss the formatting. Every replaceAllText call becomes a coin flip, and you end up with a "filled" template that's half-filled and half-placeholder.
Generating the document from scratch eliminates this entire class of failure:
- No placeholder matching → no zero-replacement failures.
- No "did it leave the guidance text in?" → there's no guidance text to leave in.
- The agent's output is one clean
createDocumentcall with a fully-formed body. - If something goes wrong, you see it immediately in the final doc, not buried in a half-edited mess.
The only thing you lose is visual polish — fonts, logos, headers. For an internal review doc that a human will sign off on, that doesn't matter. You can apply styling later, once the content is right.
2.5 Highlighting agent inputs without a post-processor
We want the human reviewer to be able to instantly distinguish "template structure" from "agent-authored content". The elegant approach would be yellow background highlighting on every agent-inserted range — but that requires either a post-processing step or the agent making a second batchUpdate call with textStyle.backgroundColor, which adds complexity to a first build.
The dead-simple approach is the [AGENT INPUT] text marker. Every value the agent writes starts with that literal string. A human reviewing the doc can scan for it visually, approve the content, and delete the marker. The final, human-approved doc has no markers at all.
This is a good example of a ContextGate design principle: prefer deterministic, visible conventions over clever automation. A text marker is 100% reliable because it's just text. It works with any document platform, any model, any rendering. It's also self-documenting — a new reviewer looking at the doc immediately understands what the marker means.
2.6 Grounding N/A decisions with the "purpose test"
The most subtle part of the system prompt is the rule for when a section is "Not applicable". It would be tempting to hard-code a list like "retrospective FFPE study → skip Screening and Consent, skip Assessment Schedule, skip Amendments". But that list only works for this one study type. The next study might be a prospective drug trial, and suddenly those exact sections are the most important ones.
The fix is to give the agent a reasoning rule rather than a lookup table:
For each section, ask: what is this section's purpose — what question does it answer? Does the study described in the source documents require answering that question?
This forces the agent to think about each section's purpose in the context of the specific study it's looking at. For our worked example (a retrospective FFPE analysis), the agent should reason its way to:
- Screening and Consent → "Not applicable — retrospective analysis of archived FFPE samples with anonymised data; no prospective recruitment or consent required."
- Assessment Schedule → "Not applicable — single retrospective lab analysis per archived sample; no participant visits scheduled."
- Amendments → "Not applicable — initial protocol version; no prior amendments to track."
For a different study, the same rule produces different outputs. No hard-coding, fully dynamic.
The critical guardrail is that the N/A reason must be grounded in the specific study design, not a generic rule. A vague reason like "not relevant for this study" gets rejected. A specific reason like "retrospective analysis of archived FFPE samples with anonymised data" is acceptable because a human reviewer can immediately verify the reasoning against the source documents.
2.7 Testing Agent 1 in isolation
Before wiring Agent 1 into the orchestrated pipeline, run it standalone. Trigger it manually in the ContextGate dashboard, watch the execution log, and check three things:
- Did the new Google Doc get created in the target folder? If yes, open it.
- Does the doc contain every section header from the template, in order? If any section is missing, the system prompt needs to be tightened.
- Are the agent's inputs grounded in the source documents? Spot-check three or four values against the protocol and contract. If the agent invented a sample size or a PI name that isn't in either source doc, you have a hallucination problem — either bump to a stronger model or tighten the "never invent" instruction.
Expect iteration. The first run of Agent 1 will almost certainly have a few rough edges — a section will be over-filled with a paragraph of prose when it should be three bullet points, or the agent will mark something N/A without a grounded reason. Each iteration sharpens the system prompt. Budget a couple hours of iteration on Agent 1 before moving on, because the lessons you learn here apply to every downstream agent.
Step 3: Build Agent 2 — the Research Proposal Manager
Agent 2 does for the research proposal what Agent 1 does for the protocol: it reads a well-scoped input and produces a structured output document. The difference is that Agent 2's input is not just the raw source folder — it's the output of Agent 1 plus the original source folder. That is, the research proposal builds on the reviewed protocol.
3.1 Input scoping
Configure Agent 2 to read from the same Drive folder as Agent 1, but with an important addition: the folder now contains the reviewed, human-approved Hospital Study Protocol. Agent 2's system prompt should explicitly tell it to prefer the reviewed protocol as the authoritative source for study design, objectives, and methodology. The original protocol and contract are still available for commercial, legal, and ancillary information.
This is a general pattern you'll see repeated through the pipeline: each downstream agent reads the outputs of upstream agents as primary sources, and the raw source material as secondary sources. It creates a natural hierarchy of trust: reviewed-and-approved content is more authoritative than raw source material.
3.2 Output structure
The research proposal has a different shape from a protocol. It's written for a research funding body, not a regulator. Sections include Lay Summary, Scientific Background, Research Questions, Methodology, Timeline, Budget, Team, Ethical Considerations, Dissemination Plan, and References. The same "[AGENT INPUT] + purpose test + grounded N/A" rules from Agent 1 apply — the only thing that changes is the template structure.
3.3 Tool surface
Agent 2 needs Google Drive, Google Docs, and Gmail — the same three toolboxes as Agent 1. No new tools needed. This is by design: each agent in the pipeline should have a small, predictable tool surface, and the surfaces should overlap so you're not provisioning a dozen different connector combinations.
Step 4: Build Agent 3 — the Compliance Reviewer
Agent 3 is where the pipeline gets interesting. It doesn't generate new documents — it reviews the outputs of Agents 1 and 2 against your organization's regulatory policies and flags violations.
4.1 The policy document
Agent 3 needs a reference document that codifies your compliance rules. Create a Google Doc called ContextGate Clinical Trials Compliance Policy containing numbered rules like:
- Every protocol must reference the applicable data protection laws (e.g. UAE Federal Decree-Law No. 45/2021 for UAE studies, UK Data Protection Act 2018 for UK studies, GDPR for EU studies).
- Every protocol must specify an anonymisation method for patient data before external sharing.
- Retrospective studies must include a statement confirming that no prospective consent is required and cite the ethics approval that permits retrospective use of archived samples.
- Every research proposal must include a budget section with itemised costs, even if the study is non-remunerative.
- Every deliverable must specify the governing law and dispute resolution mechanism.
The exact rules depend on your jurisdiction and your institution's standards. What matters is that they're concrete, numbered, and verifiable — each rule must be something Agent 3 can check by reading the documents and producing a clear pass/fail judgment.
4.2 System prompt
Agent 3's system prompt tells it to:
- Read the reviewed Hospital Study Protocol (output of Agent 1).
- Read the reviewed Research Proposal (output of Agent 2).
- Read the Compliance Policy document.
- For each numbered rule in the policy, produce a judgment: PASS, FAIL, or UNCLEAR, with a one-sentence reason that cites the specific section of the protocol or proposal the judgment is based on.
- Write the judgments to a new Google Doc called
Compliance Review — <Study Short Title>. - Email a summary to the reviewer, highlighting every FAIL and UNCLEAR judgment.
The critical design choice here is PASS / FAIL / UNCLEAR, not PASS / FAIL.A binary judgment forces the agent to guess when it doesn't have enough information. A ternary judgment lets the agent explicitly surface uncertainty, which is exactly what you want — an unclear judgment is a signal for a human reviewer to dig in, not an automatic blocker.
4.3 Tool surface
Agent 3 needs Google Drive (to read the protocol, proposal, and policy doc), Google Docs (to write the review), and Gmail (to send the summary email). Same three toolboxes. Still no new connectors.
4.4 Running Agent 3 against the previous outputs
Because Agent 3 reads the reviewed (human-approved) versions of Agents 1 and 2's outputs, it naturally benefits from any corrections the human reviewer made in the earlier gates. This is the compounding value of the pipeline: each human touchpoint improves the quality of every downstream step.
Step 5: Build Agent 4 — the DOH Compiler
Agent 4 takes everything — reviewed protocol, reviewed proposal, compliance review — and assembles a final submission package for the Department of Health (or your equivalent regulatory body). This is the most procedural agent in the pipeline. It doesn't do a lot of reasoning; it mostly transforms and formats.
5.1 What the package looks like
A typical DOH submission package contains:
- A cover letter addressed to the regulator
- The Hospital Study Protocol
- The Research Proposal
- A Compliance Statement (derived from the Compliance Review)
- A signed declaration from the Principal Investigator
- A table of contents linking all the above
Agent 4 generates a single Google Doc containing the cover letter and the compiled package, with links to each of the constituent documents. The PI's signed declaration remains a human step — Agent 4 produces a clear [SIGNATURE REQUIRED] marker where the signature will go.
5.2 The "never fabricate a signature" rule
This is worth saying explicitly, because it's a class of error that LLMs occasionally commit: Agent 4 must never generate text that looks like a signature or a signed statement. The system prompt includes an explicit instruction: "If a document requires a human signature, produce the [SIGNATURE REQUIRED] marker. Never generate prose that implies the document has been signed, reviewed, or approved by a specific human unless that human has explicitly approved the output through the ContextGate review gate."
This matters because in a regulated environment, a document that falsely implies human sign-off isn't just embarrassing — it can be a legal problem. The marker-based convention keeps the boundary crystal clear.
5.3 Tool surface
Google Drive, Google Docs, Gmail. Same as every other agent. By now you'll have noticed that the entire clinical trials pipeline uses exactly three toolboxes, which makes connector management trivial.
Step 6: Build Agent 0 — the Router / Orchestrator
Agent 0 is the conductor. It doesn't produce any study content itself — its entire job is to decide which agent runs next, pass the right context to that agent, and pause for human approval between steps.
6.1 The orchestration pattern
Agent 0's system prompt contains, in order:
- A description of the pipeline. The five-agent flow, what each agent does, what inputs each needs, what outputs each produces.
- The trigger logic. How Agent 0 knows what state the pipeline is in — typically by checking the Drive folder for the presence of reviewed output docs (e.g. if
Hospital Study Protocol — ... — APPROVEDexists, Agent 1's gate is complete and Agent 2 should run next). - The dispatch instructions. For each pipeline state, a clear rule for what to do: "If the state is
new intake, no protocol yet, trigger Agent 1 and stop. If the state isprotocol approved, no proposal yet, trigger Agent 2 and stop." - The handoff email. When Agent 0 completes a dispatch, it sends an email to the reviewer summarizing what just happened and what to do next: "Agent 1 has drafted the Hospital Study Protocol for the study. Review it here [link]. When you're happy with the content, rename the file to add
— APPROVEDat the end, and Agent 0 will automatically proceed to Agent 2." - The critical rule: one dispatch per run. Agent 0 runs, figures out the pipeline state, dispatches exactly one agent, sends the handoff email, and stops. It never chains multiple agent runs in a single execution. This is what makes the human approval gates enforceable.
6.2 How Agent 0 sends instructions to each downstream agent
In ContextGate, Agent 0 doesn't literally send a system prompt to Agent 1 — each downstream agent already has its own system prompt baked in. What Agent 0 sends is the trigger plus context: "Run Agent 1 against folder <folder ID>, and here's any additional context the human reviewer has added via comments or notes."
If you want Agent 0 to pass dynamic instructions to a downstream agent (e.g. "the reviewer flagged that the sample size calculation needs to be double-checked"), you can model this as an instruction message that Agent 0 appends to the source folder as a small Google Doc named Reviewer Notes — <timestamp>. Downstream agents are instructed to read any Reviewer Notesdocs in the folder as high-priority context. This keeps all inter-agent communication visible, auditable, and stored in the same folder as the study — no hidden state, no shared database, no lost messages.
6.3 How Agent 0 handles failure
Not every run succeeds. Agent 1 might time out. Agent 3 might flag a policy violation that blocks the pipeline. A source document might be corrupted. Agent 0's system prompt includes explicit handling for failure states:
- If the most recent agent run failed, Agent 0 does not retry automatically. Instead it sends a diagnostic email to the reviewer with: the name of the failed agent, the error message, the Drive folder context, and a suggested next action. The human decides whether to re-run, fix the input, or escalate.
- If Agent 3 produces any FAIL judgments, Agent 0 pauses the pipeline and sends a blocker email to the reviewer. The reviewer must either correct the upstream output or explicitly override the compliance finding in a
Reviewer Notesdoc. Only then does Agent 0 resume. - If a source document is missing or unreadable, Agent 0 sends an intake error to the reviewer and does not dispatch any downstream agent.
This failure model is deliberate: Agent 0 is conservative. It would rather pause and ask a human than make a judgment call that could cascade into a bad submission package.
6.4 Tool surface for Agent 0
Agent 0 needs:
- Google Drive — to inspect the state of the intake folder and detect which reviewed output docs exist.
- Gmail — to send handoff and failure emails.
- ContextGate's internal "trigger agent" tool — to dispatch Agent 1, 2, 3, or 4. This is a ContextGate-native capability, not a third-party connector.
Notice that Agent 0 does not need Google Docs. It doesn't write any documents itself. This is another example of the minimum-tool-surface discipline — every capability Agent 0 doesn't have is a class of error it can't commit.
Step 7: Wire in the human approval gates
The approval gates are the most important feature of the pipeline, and they're also the simplest to implement. A gate is just a rename convention.
When Agent 1 produces a draft, it names the file Hospital Study Protocol — PENDING HUMAN REVIEW. The human reviewer opens the doc, reads it, edits anything they want to correct, deletes the [AGENT INPUT]markers from content they've approved, and when they're satisfied they rename the file to replace PENDING HUMAN REVIEW with APPROVED.
That's the gate. When Agent 0 next runs, it sees the APPROVED suffix and knows it can dispatch Agent 2. Before the rename, Agent 0 refuses to proceed.
Why rename-based gates instead of a dedicated review UI?
- Zero new surface area. Your team already knows how to rename a Google Doc. No new tool to learn, no new app to log into.
- Works with existing review workflows. If your institution already uses Drive comments, suggested edits, or share permissions for review, all of that still works. The rename is the final "I'm done" signal, added on top.
- Fully auditable. Drive's version history captures exactly when the rename happened and who did it. That's your approval log, for free.
- Easy to override. If the reviewer accidentally approves the wrong version, they rename it back. No database state to untangle.
You can absolutely build a fancier review UI later if your team wants one. But for a first build, rename-based gates are the fastest path from zero to a working pipeline.
Step 8: Trigger the pipeline end-to-end
Time to run the whole thing. Here's what a complete pipeline run looks like:
- You drop the protocol and contract into the intake folder.
- You manually trigger Agent 0 (or configure a Drive-change trigger so Agent 0 runs automatically on new intake).
- Agent 0 inspects the folder, sees no output docs yet, and dispatches Agent 1. It sends you an email: "Agent 1 is drafting the Hospital Study Protocol. Expected completion: 2–3 minutes."
- Agent 1 runs. It lists the folder, downloads and reads both source docs, applies the purpose test to every template section, generates the new Google Doc, and emails you a summary with the doc link and a list of sections flagged for review.
- You review the protocol. Scan the
[AGENT INPUT]markers, correct anything wrong, delete the markers on content you've approved, and rename the file fromPENDING HUMAN REVIEWtoAPPROVED. - You re-trigger Agent 0 (or wait for the Drive-change trigger). Agent 0 sees the approved protocol, dispatches Agent 2, and emails you.
- Agent 2 drafts the Research Proposal using the approved protocol as its primary source. You review and approve.
- Agent 3 runs compliance review against the approved protocol and approved proposal. It produces a Compliance Review doc with PASS / FAIL / UNCLEAR judgments for every policy rule.
- If everything is PASS, you approve the compliance review. If anything is FAIL or UNCLEAR, you fix upstream and re-trigger. The pipeline loops as many times as needed until compliance is clean.
- Agent 4 compiles the submission package. You review the cover letter and the compiled doc, add the PI's signature where the
[SIGNATURE REQUIRED]marker is, and the package is ready to submit to the Department of Health.
A first end-to-end run, including all human review time, takes roughly 2–4 hours of total wall-clock time for a single study. Pure agent time is under 15 minutes — the rest is the human gates. Compare that to the weeks or months of coordinator time a manual process requires, and the ROI is immediately obvious.
Why this approach wins over the alternatives
It's worth being explicit about why the five-agent-plus-orchestrator design beats the intuitive alternatives.
vs. a single monolithic agent
A single agent trying to do protocol mapping, proposal generation, compliance review, and submission compilation in one prompt runs into three problems. First, the prompt becomes enormous — easily 8,000+ tokens — and the agent's attention gets smeared across too many concerns at once. Second, when something goes wrong, you have no idea which concern failed. Third, there's no natural place to insert a human review gate, because the agent does everything in one execution. A monolithic agent might look simpler on paper, but it's strictly worse in every dimension that matters for a regulated workflow.
vs. hard-coded RPA scripts
RPA scripts are precise and reliable — until the inputs change. A script that expects the Hospital Study Protocol Template to have placeholder text <<insert study title>> breaks silently when someone updates the template to [STUDY TITLE]. Clinical trial documents change all the time: regulators update their templates, institutions revise their standards, new jurisdictions add requirements. An LLM-driven pipeline adapts to those changes because it's reasoning about meaning, not matching strings. It's a more robust substrate for a domain where the inputs are inherently variable.
vs. generic ChatGPT workflows
ChatGPT can draft a Hospital Study Protocol. But it can't: read your Drive folder, only your Drive folder; write to a specific output doc; enforce a policy rule that every protocol must cite the data protection law; log every document access for an audit trail; or coordinate handoffs between multiple specialist agents with human gates between each. ContextGate wraps all of those governance properties around an LLM, which is what turns a general-purpose assistant into a production-grade agent pipeline.
vs. building it all from scratch with raw LLM APIs
You could absolutely build this pipeline with raw OpenAI or Anthropic APIs, a task queue, a database, and some glue code. It would probably take a team of two engineers two months. ContextGate collapses that into a configuration exercise: write the system prompts, enable the toolboxes, paste in the policies. A clinical research back office team can stand up the full pipeline in a single afternoon without writing any code.
Broader applications
The clinical trials pipeline is one example of a general pattern: any workflow where a set of source documents flows through multiple specialist review steps into a final submission package can be modeled as a ContextGate agent pipeline. The same architecture works for:
- Regulatory submissions to the FDA, EMA, MHRA, or any other medicines regulator.
- Grant applications to research funding bodies, where a single input dossier needs to be reshaped into proposal, budget, impact statement, and CV package.
- Legal due diligence for M&A, where source documents need to be summarized into data room disclosure packages, compliance checks, and executive briefings.
- Audit preparation, where a set of internal records flows through scoping, evidence gathering, findings drafting, and management response.
- Insurance claims processing, where intake documents flow through triage, policy matching, adjudication, and payment authorization.
In each case, the pattern is: small, scoped agents with single responsibilities, an orchestrator that dispatches them, human review gates between each step, a deterministic text convention for marking agent-authored content, and a small tool surface per agent. Learn this pattern once in the clinical trials context and you can apply it to every other regulated back-office workflow your organization runs.
Ready to build?
Sign up for ContextGate and start building your first agent pipeline. The clinical trials pipeline in this article, including all five agents and the full Agent 0 orchestrator prompt, is available as a one-click template from the ContextGate Agent Templates gallery — you can import it, point it at your own intake folder, and have a working pipeline in under an hour.
ContextGate is the agentic governance platform for regulated industries. Every agent you build runs under policy enforcement, full audit logging, and human review gates — so you can deploy AI into back-office workflows that actually matter, without the governance debt.
We're especially interested in hearing from clinical research teams that want help adapting this pipeline to specific jurisdictions or institutional standards. Reach out to us via our website 'get in touch' form.